
A busy few weeks, parts from China, emergency stuff locally and we now have a fully functional G-Seat
Any of the works related to “@steely’s G-Seat” is Copyright 2020, Rowan Hick released under the Creative commons license Attribution-ShareAlike 4.0 International (CC BY-SA 4.0) . Read here for more details of what you can and can’t do, along with my intent.
Yesterday I achieved the next big milestone of the G-Seat to get the bottom power pack assembly done, wired in, configured so….. the entire seat works ! So what’s it like? Well I’m not going to make it that easy for ya.. there’s a lot of work to get there. Here’s the work since last adventure
Following along A quick note if you’re finding this interesting I started a discord build log/diary that’s way more as-it happens, along with I suggest subscribing to my YouTube channel as I throw videos up. This blog tends to get updated at the end of each stage.
Beauty shots
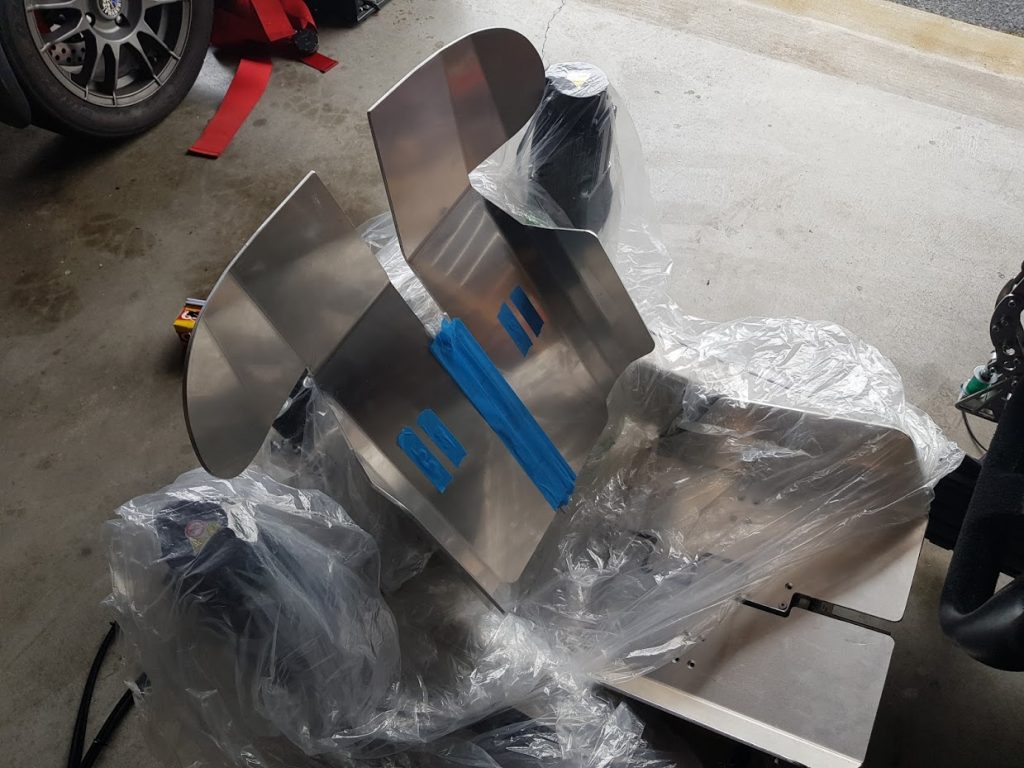
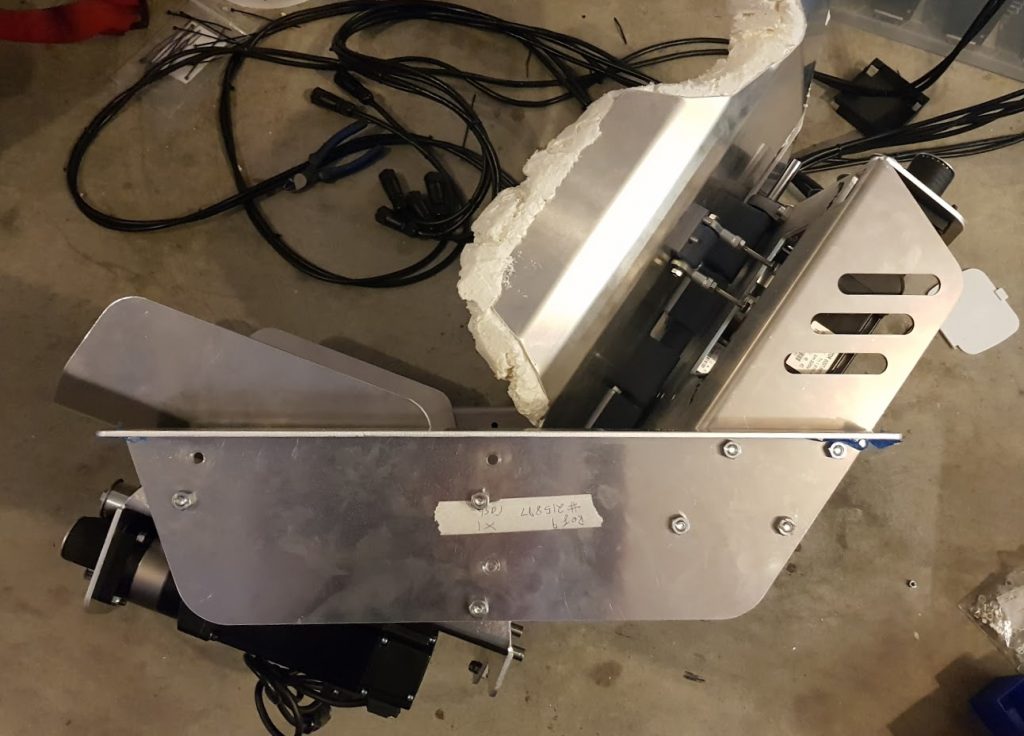
Before I made an absolute mess of things I took some photos of the rig. Knowing it could possibly never look this good again with what I was about to do to it :


Right, now that I’ve had my bokeh fix, onto the rig. I ended up with multiple jobs on the go :
- Forming a better seat shell/padding
- Bottom PowerPack drive system assembly
- Testing harnesses
Form fitting seat
Sliding around in the seat was no good to anyone. So first step was to solve that as I didn’t want to remanufacture any of the alloy. Using some classic old techniques I got a tube of spray polyurethane foam and went to town on the two upper panels. On the nerve wracking scale it was quite high, I mean the seat was looking really good and then yeah, it was one of the ‘make it worse, to get it better’ type deals
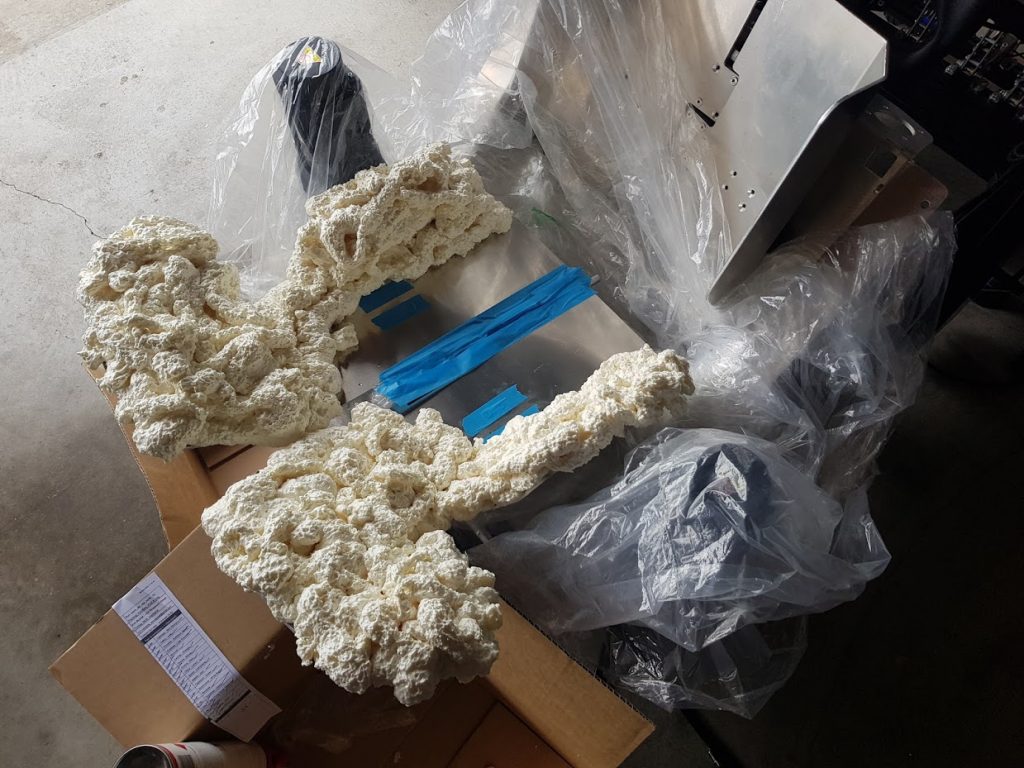

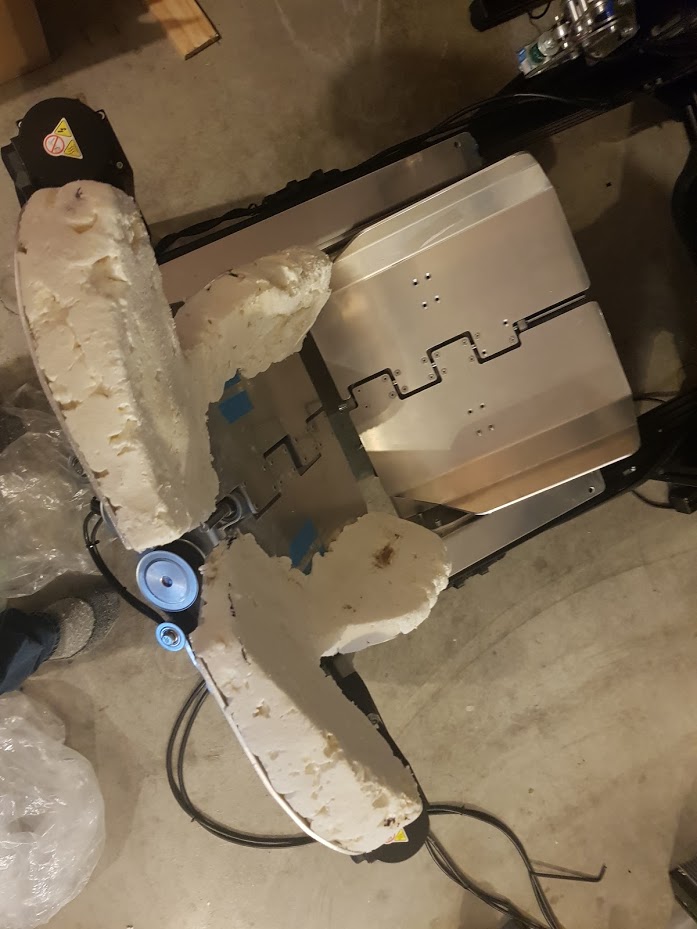
Despite my trepidation on the looks what a difference it made. It immediately move the pressure up the seat and took away the dangerous hard edge. Oh did I say dangerous? Well not used lightly – after 2 hours of testing I developed a tender spot on the side of my ribs, and this was with the servos at 1600rpm speed (not the 3000 they’re capable of). Which shows that this machine could easily hurt you.
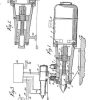
Assembling the bottom power pack
After months of delays finally my last servo arrived. A massive shout out to the Master Jiang 3SMT store – even though shipping was not their problem, they worked to make it right and managed to get me a servo in a week when I’d been waiting for over 2 the first time round. If you want servos for SFX-100/this project, buy from them [obligatory note: I have not received a single $ from any supplier, nor any part of the SFX project, so this is not one of those ‘endorsements’]
To help others out or at least warn them off doing it, I recorded a video of the complete drive system
Update from video: A *much* better method of marking the push rod locating holes
In the video above you watch me futz around for a bit trying to get the right position for the grub screw locating holes on the main shafts. Well, I found a better way.
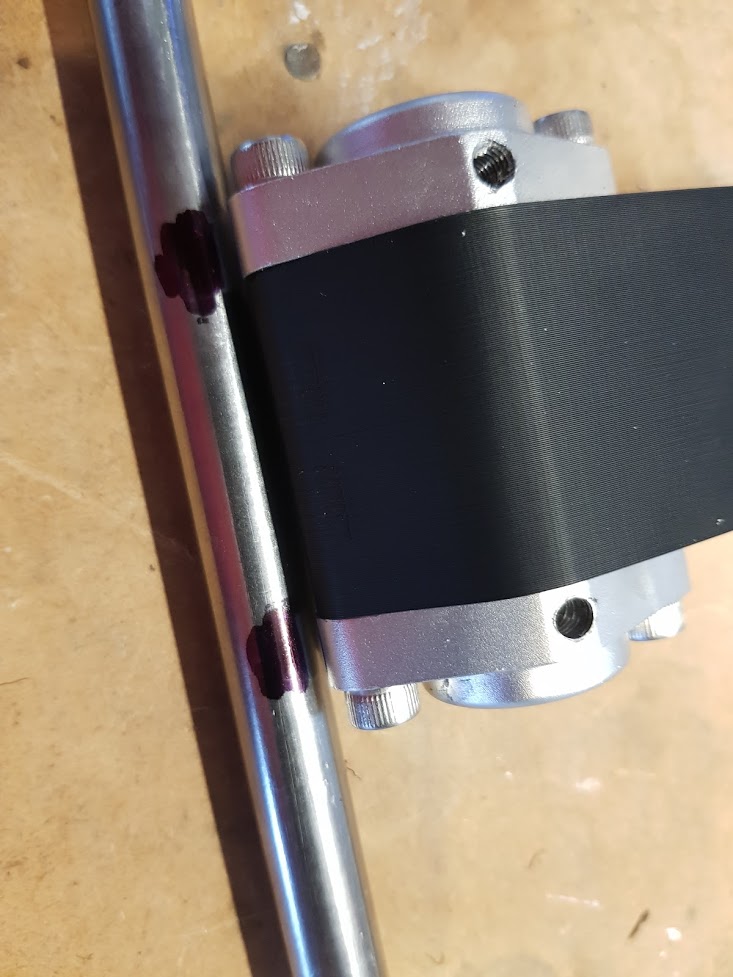
Step 1 Mark approximate position 
Step 2 measure centres 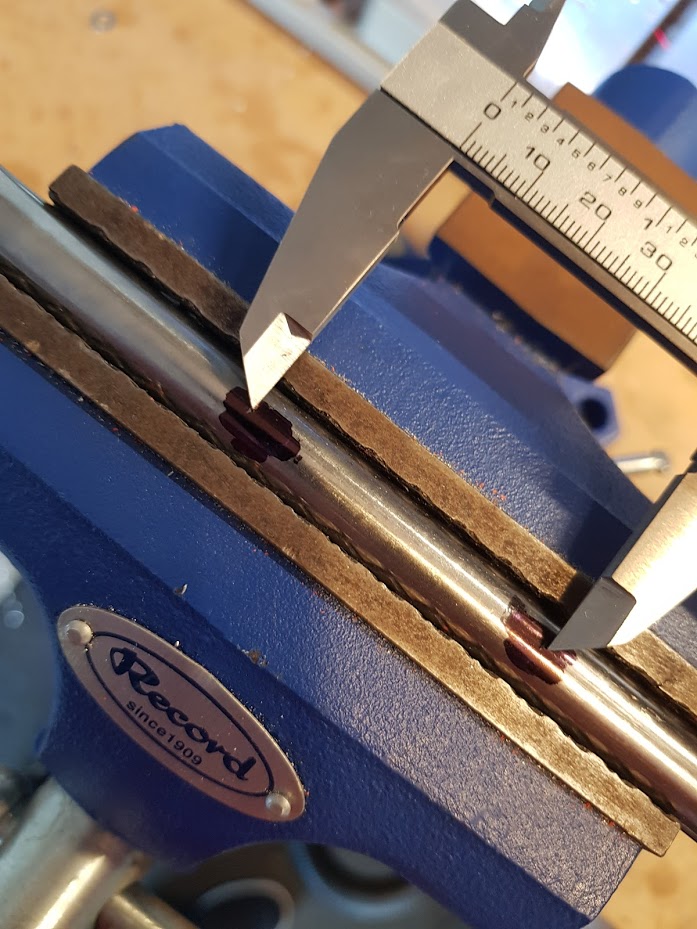
Step 3 Scratch in Centres & Punch 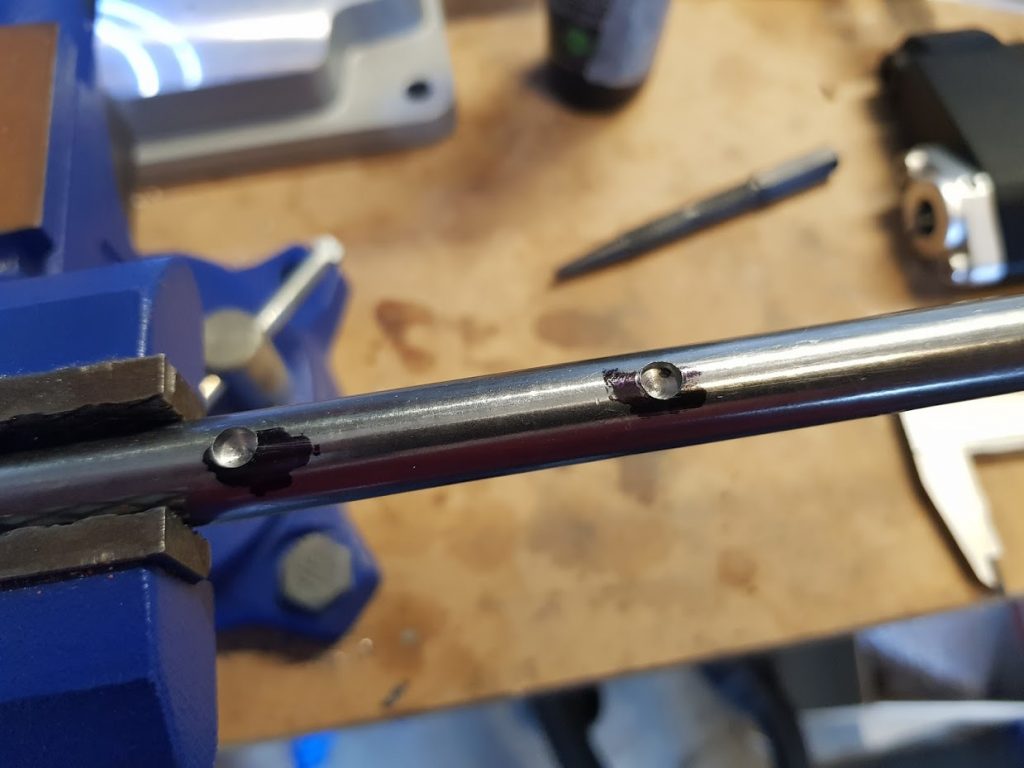
Step 4 Drill
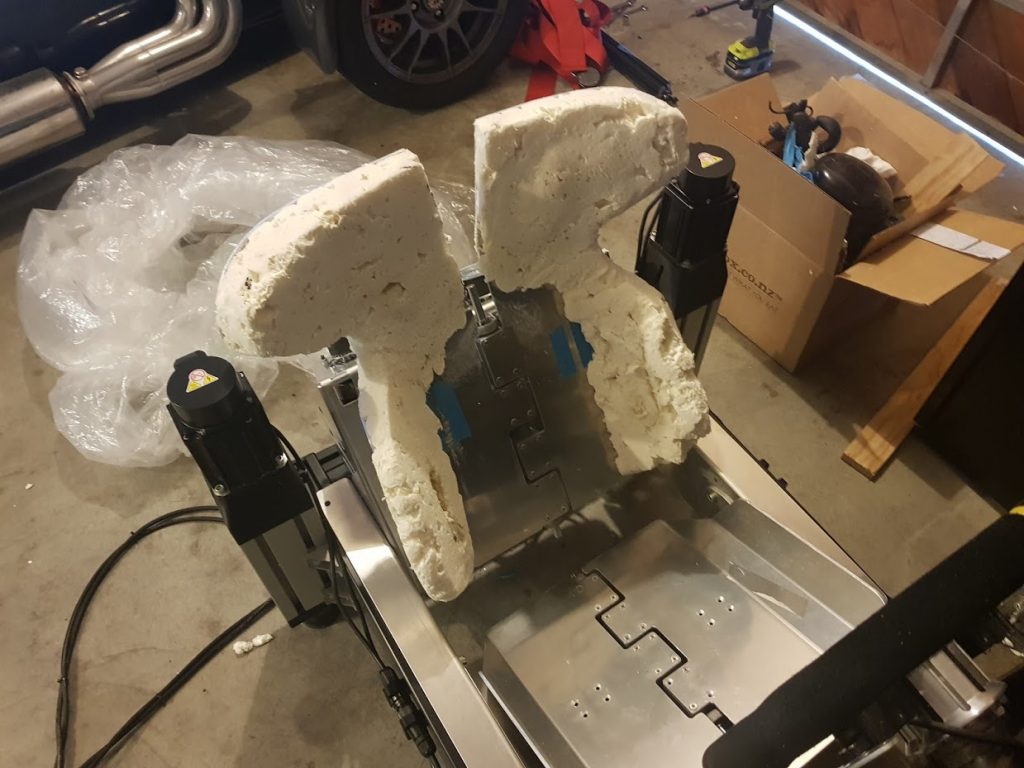
With a better technique for making the main shaft, it took all of about an hour to assemble the drive system :
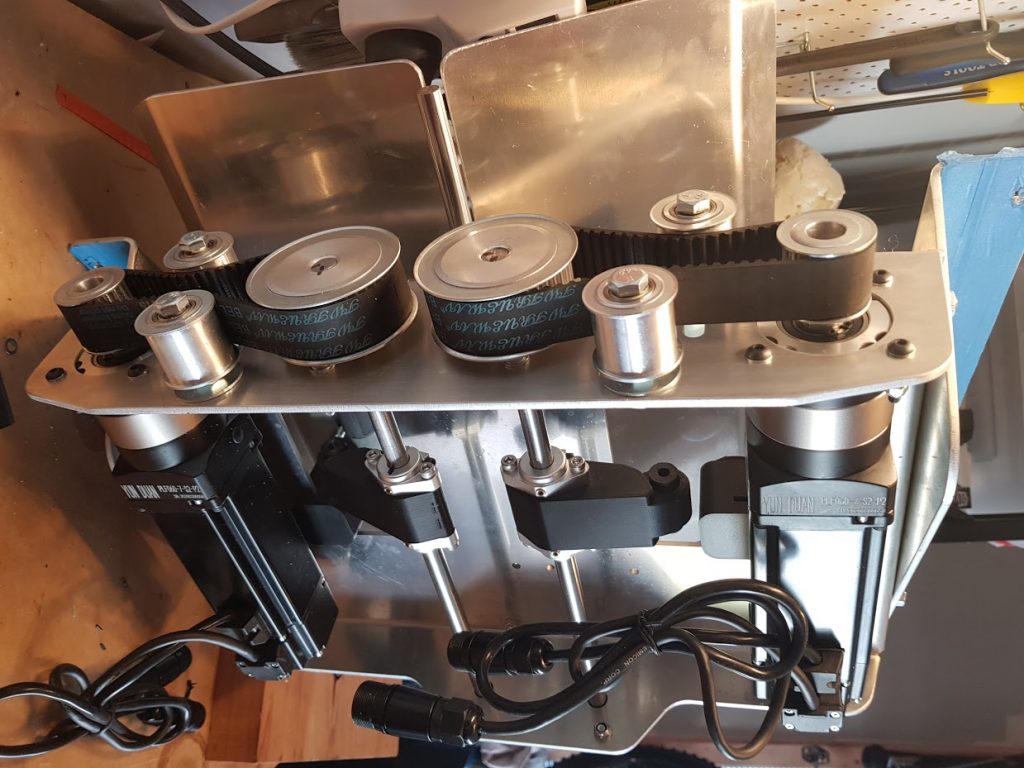
Woah boy it started getting some weight on. Still.. I could lift it by myself. Not quite as graceful going in as it was coming out. I’m guessing we’re at about 20-25kg by now.
Ready to be put into the rig.
Disaster !
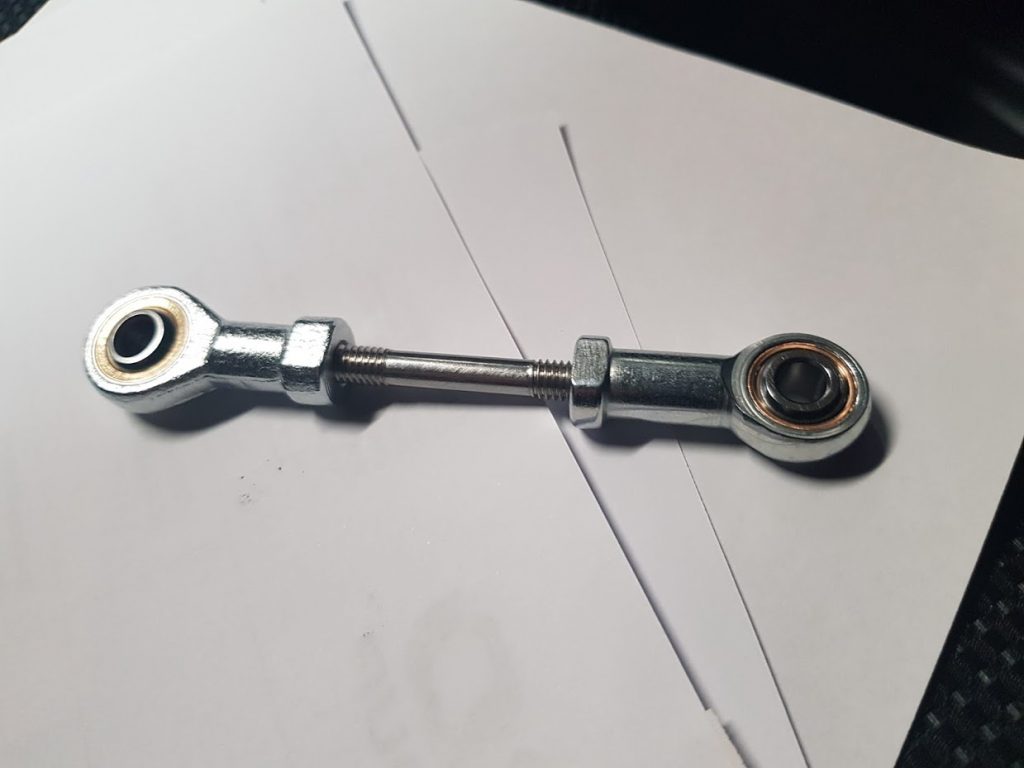
I got to the final last hurdle, went into my box of bits, and realised I was 2 short of the 6mm rod ends. Now to say I was frustrated with myself was an understatement. I’d waited months to get my servo, where I could have checked all the other parts – and I hadn’t. Hours before firing it up I realised I couldn’t … so quickly off to the googles. And what do you know, I found these guys 8 mins drive from my office ! And what’s more is they had rod ends in stock, and undoubtedly higher quality. I quickly popped over at lunch time and got a couple of rod ends. Quite the difference in quality, price, and availability :
Wire. Configure. Test.
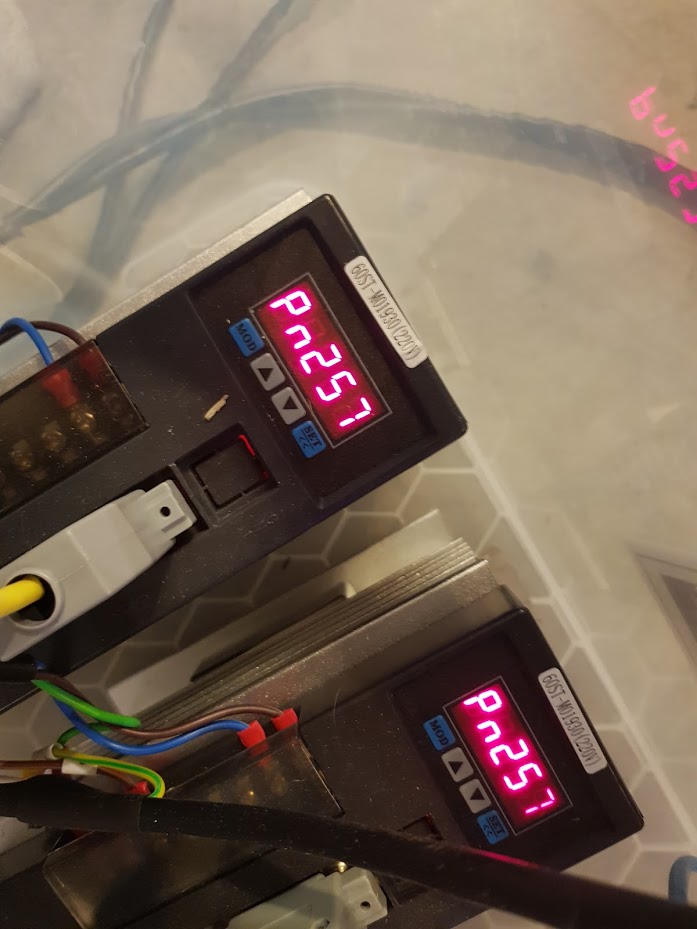
Before getting too excited we’re only about halfway there – the next step is we need to wire it up, configure the servo drives, add some effect profiles and test !
My parallel cables hadn’t come in, so I kept going with my bodgy temporary solution for my Simfeedback Arduino controller. (side note: later on in testing I finally struck an infamous wiring problem where I’d managed to get the DIR wire to GND, a servo would only go way way and not go in reverse…be careful of your wiring )
| Setting | Description | Value |
| pn51 | RPM | 1600 (4:1) 3000 (7:1) |
| pn97 | Rotation | 0 on right side, 1 on left side (or vice versa if rotation is incorrect) |
| pn98 | Pulse (Step) Multiplier | 14 on the bottom |
| pn257 | Moment of Inertia | on 4:1 increase this to 2.5 or so. This makes the flaps more ‘rigid’ |
| Others | same as SimFeedback recommendations | p8 : 300 p9 : -300 p109 : 1 p110 : 30 p113 : 20 p114 : 10 p115: 100 |
SimFeedback setup
This bit was pretty easy, I just copied the upper panel effects, changed the motor ID’s, and boom – the lower panels done. I played with p98 to get the intensity level right so I didn’t need to play with the effect based intensity settings in software.
There’s lots of little tuning tweaks/tips here which warrants it’s own video/blog post. So we’ll hold that off for a future post.
A note for anyone that does attempt this, you don’t want to connect up the rods until you have confirmed the direction of the servo’s is correct – otherwise your servos will try to pull the pieces apart. They will more than likely go into over-torque alarm (AL-06) so no harm will/should be done, but best to try avoid that. Get the directions right – adjusting p97 if you have to, *then* connect up the rod arms.
So what’s it like?
Racecars are brutal, brutal machines. I think there’s this mystique and it’s not until you’re actually strapped into a hot sweaty environment that’s loud, raw and downright intimidating that you’ve got some idea. They are a far, far cry from the sim rigs that most of us enjoy in the comfort of offices, basements and garages.
There’s almost no way a Sim Rig can be too brutal, but, well, it could come close…. and I think that’s where my contraption is, not in terms of g-force, but in terms of velocity/movement. I’ve had a sore & stiff back and sore neck from testing in the evening, multiple times. You do get thrown a around fairly violently – infact one evening I was like “no more!”. Now I’m not a delicate flower and I’m not a big guy – but I’ve had some fairly solid MTB crashes (including one that caused a heamatoma the entire length of my upper leg once… ) I can guarantee this, you would not want the G-Seat up *any* higher. And there’s still margin in the servo speeds which is just crazy.
I experimented and settled on roughly these behaviours below
- Upper/Back panels. Home position 30% of travel. Using both acceleration and leteral G
- Bottom Panels. Only lateral G – braking felt a bit weird.
I tried some experimenting with braking through the bottom, but because of where the pressure came on – it felt like it was pushing me up vs back. I’m going to experiment with increasing the angle of the bottom power pack to see if it feels better moving the pressure up/along my legs vs my posterior
Its now all highly immersive. 6th gear flat out on a rally stage in heading down into a 1 right you don’t want to clip the outside logs, hard on the breaks, the nose dives and you feel the load on the left panels. Dirt Rally 2.0
Coming up over Skyline heading into the esses, you really, really don’t want to loose it. As you turn in to the chase at the end of conrod you get shoved sideways by the big dip on turn in. Assetto Corsa Competizione
T4 at Hungaroring, you know the curb’s big, the more you hit it the more you can carry through without coming off the track at the exit – bracing yourself for the hit. Assetto Corsa Competizione
How about getting into an Oreca LMP machine. Sit on the crown of the road at Le Mans, shift to the left and you start leaning on the left hand panel. Onto the right, feel the transfer on the right hand panel in RFactor2
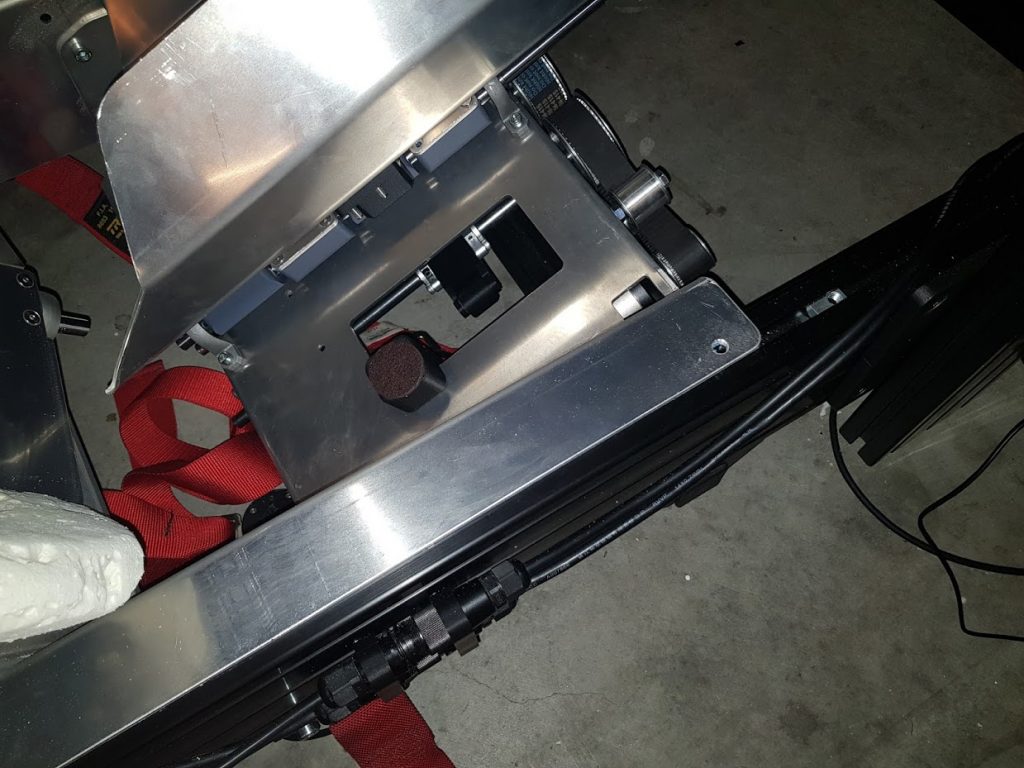
Adding Harnesses
The internets (namely @hoihman) told me that harnesses were key on other G-Seats so I set about finding a set. Now you can go out and buy a brand new $600 harness, or you can find an expired set on trademe (or your countries respective flea market). They range between getting given away or next to no money as they’re not legal for race use anymore. But for sim racers, we don’t care. $40 later a had a legit Sabelt 6pt 3″ harness with camlock (you want a camlock). On cheaper harnesses the shoulder straps can be quite difficult to loosen, so keep that in mind.
With a tip of the hat to Atsushi I formed a harness mount the looked very utilitarian but did the job.
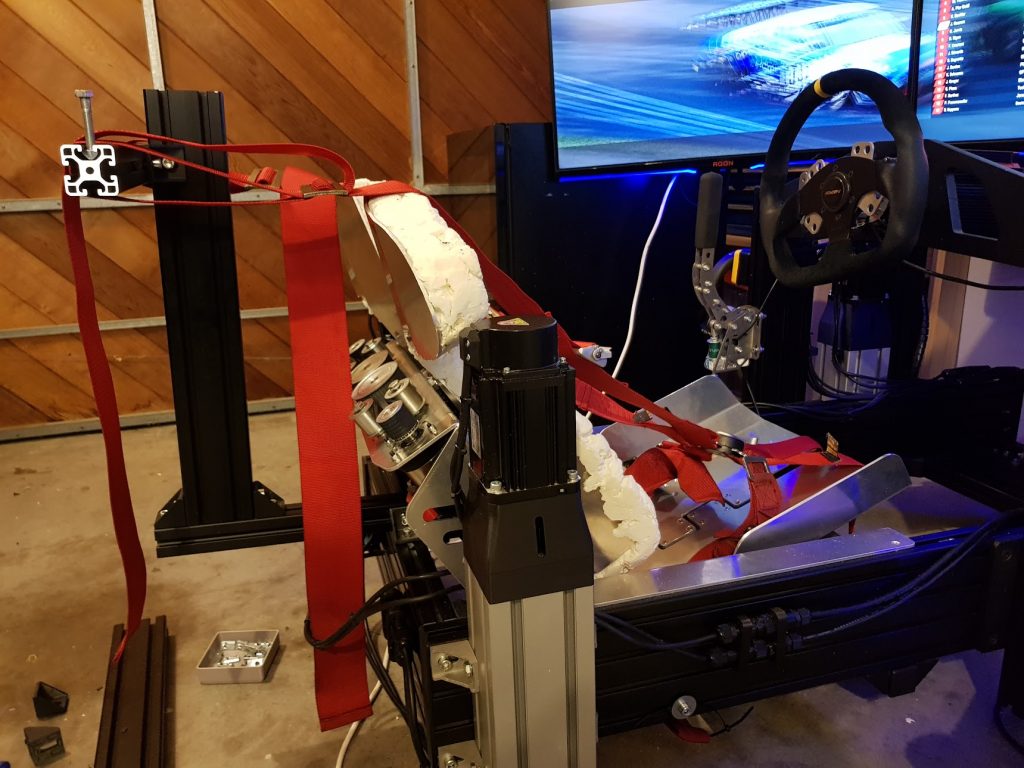
And…. apart from feeling a tad ridiculous it actually made quite a difference. A good %age of that is the mental feeling of when you’re cinching down harnesses (at least my) brain goes into race mode, the rest of the difference is of course being able to stay in one spot on the seat and increased pressure as you have resistance.
So that’s a little surreal
18 months later we have a functional G-Seat. I might even go far as to say an extreme performance G-Seat. Certainly bigger, nastier, faster and more dangerous than what’s out there commercially that’s electro-mechanical based.
After the weekend I kinda had this “wow, I’ve actually done it”. My other half asked “so now what are you going to do?”
Well make it look absolute pimping of course. I’ve got cables everywhere, drivers everywhere, the seat itself needs to be upholstered, need to clean up the aluminium, do some cable management, etc etc…. oh, and build a Belt tensioner !
Did I mention that? probably not. You see the static belts were cool n all, but the caused the inverse effect of tightening under acceleration (as the rear panels move forward under accel), so they need to loosen slightly under accel and tighten under breaking. Only one way to do that, more servos ! (well, just one more)
What’s next?
- Making it look pretty
- Adding a belt tensioner
- Wiring up a proper driver cabinet
- Cable management
- Open source the files


Hey Rowan, you still have the Fraser? I’m embarking on a similar build but with Toyota 3SGTE.
Yup. You’re a mad man ! Good luck 🙂 (it will be awesome)
Just curious if you’re ever going to write a DIY for those of us who want to go this route? Or does it exist already and I just can’t find it <3