
So lets get this out of the way; there’s no way a motion simulator can actually simulate g-forces – what it can do however is “cue” forces. The more cues you get the more immersive the experience is. A G-Seat is kind of a misnomer in that sense; that said they are damn good at signalling what a car is doing.
This series of posts is a retrospective on exactly what it takes to DIY up something from scratch so we’re rewinding a good year and not tallying up the amount of time, effort and broken parts !
What is a “G-Seat”
A G-Seat is designed to “cue” g-forces by moving the internals of the seat next to your squishy human self. In a car when you turn left; the invisible hands of physics push you right into the seat. Turn really hard left and you’ll near launch out of the seat. Race cars have bucket seats and harnesses to keep you in one place. Now; when you think about it you can’t actually feel g-forces; what you feel is getting squished against the seat. This is what a G-Seat tries to emulate in reverse, it pushes into you as the g-loads build up in your sim title.
That is a vast oversimplification; there is a tonne of detail that gets transmitted through the seat. In race driver terms you often here “feeling” what the car is doing; what they’re really doing is feeling the weight transfer and forces and instinctively reacting based on what those forces are doing. Our favourite sim titles actually have a staggering amount of detail in those g-forces, so what if you would actually feel those g-force details? How would it change your sim experience (spoiler alert: it’s awesome)
I tried one and “oh o..”
G-Seats have been around for quite some time in military training, then more recently with commercial units. I was fortunate enough to try out a GS-5 – which was great fun and definitely added a whole new level of immersion but the overall package was just not to my standards. Namely it was a bit noisey and used the Kirkey seat as a base which for the money just isn’t me.
Naturally with a bit of DIY enthusiasm and growing repertoire of 3D modelling and printing skills the ambitious mad scientist in me said “right, lets build one”.
Design Criteria
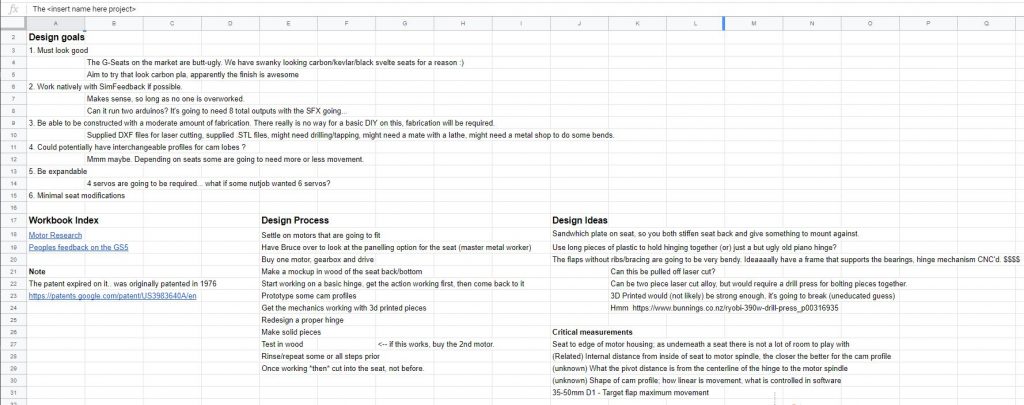
In order to build this thing I had to set some must haves :
- Must retrofit onto my existing seat
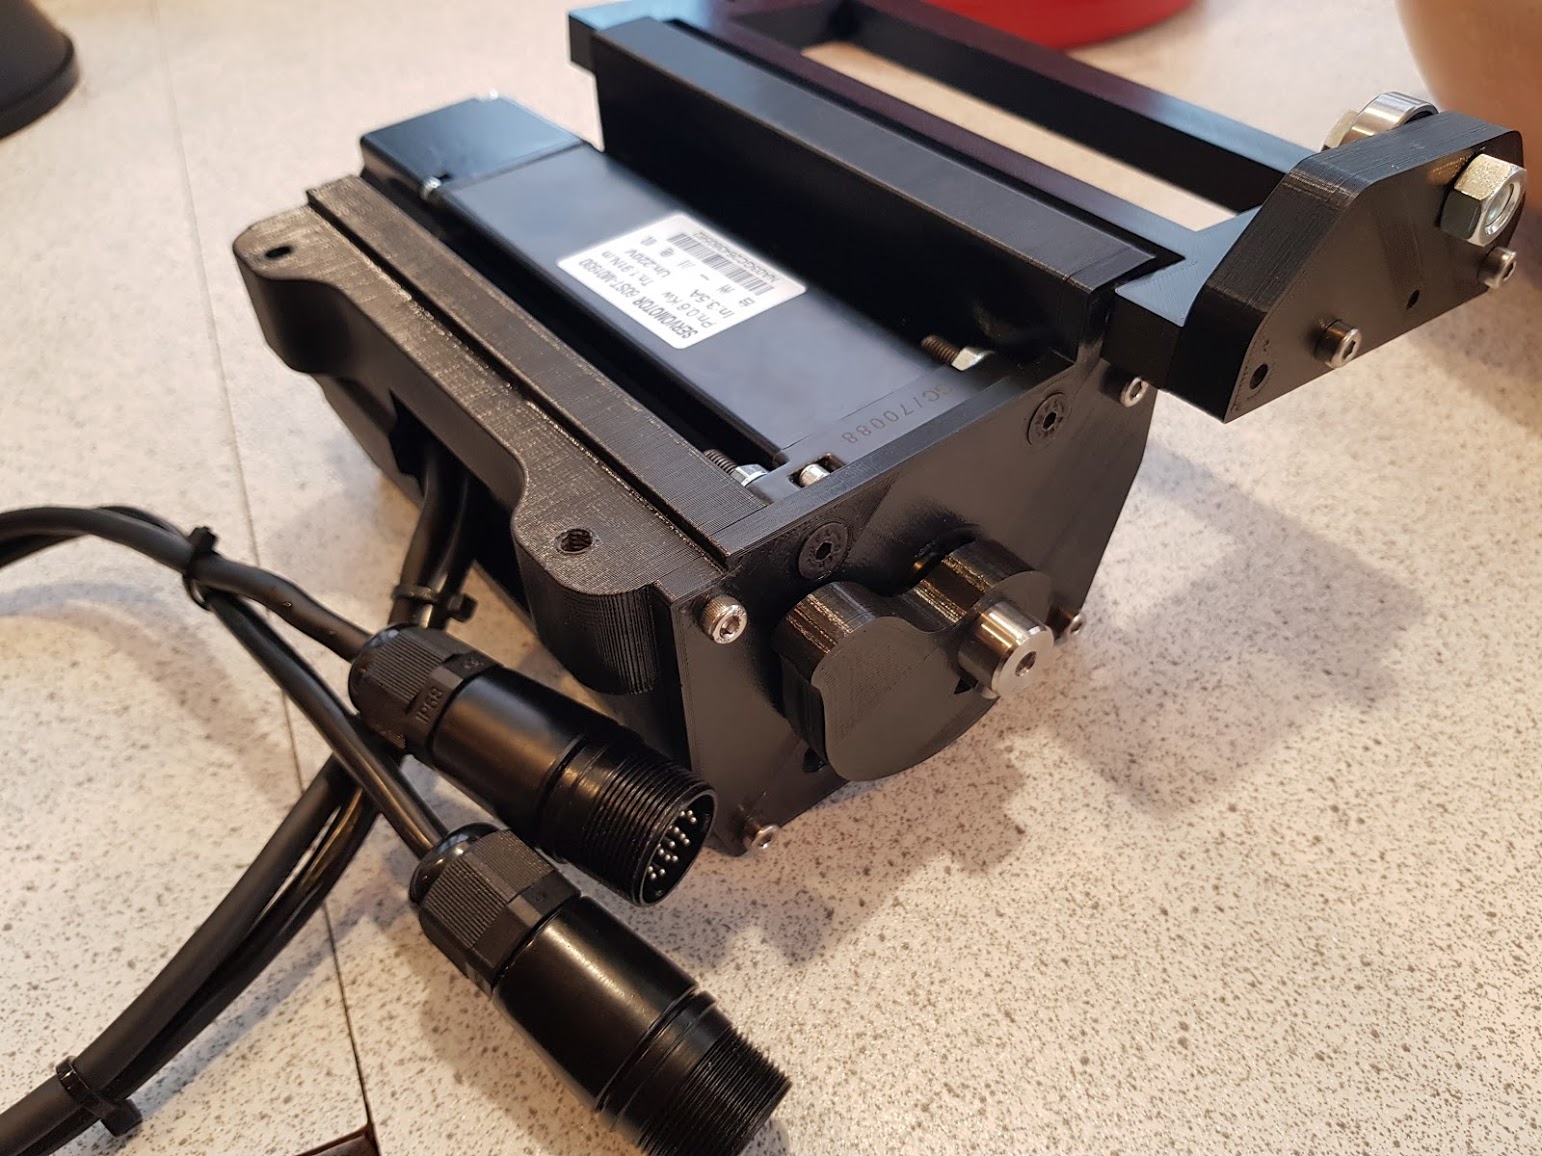
- Must use AC Servos [introduced after prototype 1]
- As much 3D printing as I can
- Can’t tilt seat forward, must fit within the SimLabs P1
- Wanted both accel/decel movement and lateral movement
Tools at my disposal
You’re constrained by the tools you’ve got to build things. A CNC mill for instance would have made some components a lot easier.
- 3D Printer
- Various saws
- Drill Press (purchased part way through)
- Bench Vise
- The internet
Later through the development I found out I could get Laser cutting and folding of alloy done *really* cheap. Which changed things…
A little note about the SFX project and this, why I’m sharing.
Because I’m one of the core team on the SFX project; doesn’t automagically mean this G-Seat design is going to be a SFX-100 DIYable thing. I repeat this will not ever likely be a DIY Plan based system Why? seats are too damn difficult, with too many variables. And besides which, one wrong move and you’ve got some broken ribs !
Why I’m sharing all of this information? Well – there’s no sense someone else repeating all the learning processes and through community sharing and learning, we’ll end up with some pretty cool sim racing prototypes. The market (generally…) is too small for anyone to make real $ commercially. This is one of those areas open source would definitely lead to a better product
Prototype 1
Feb 2019
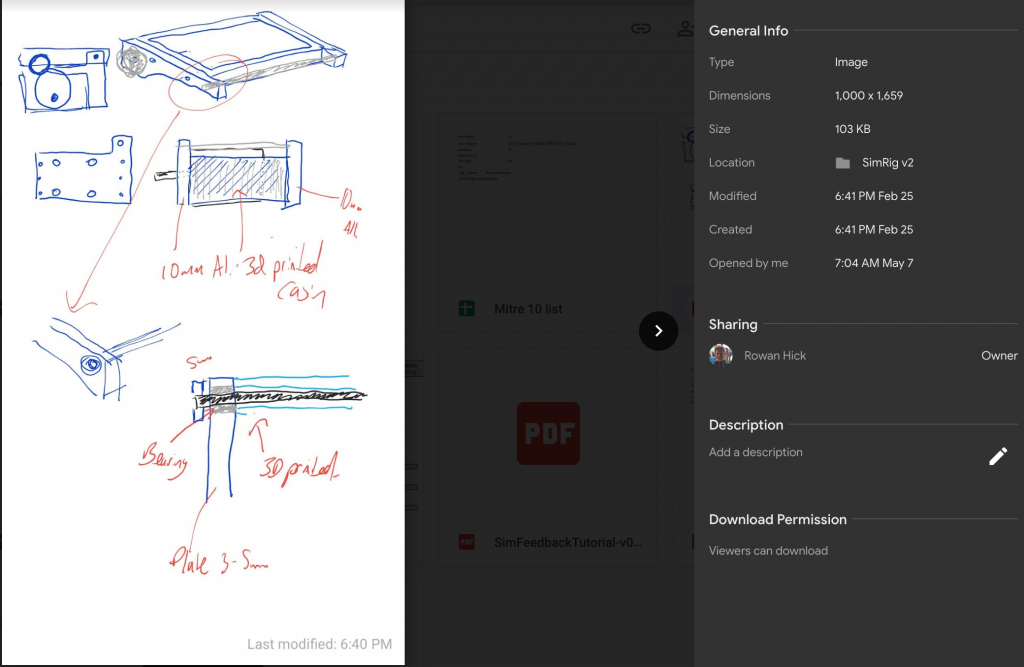
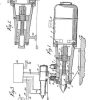
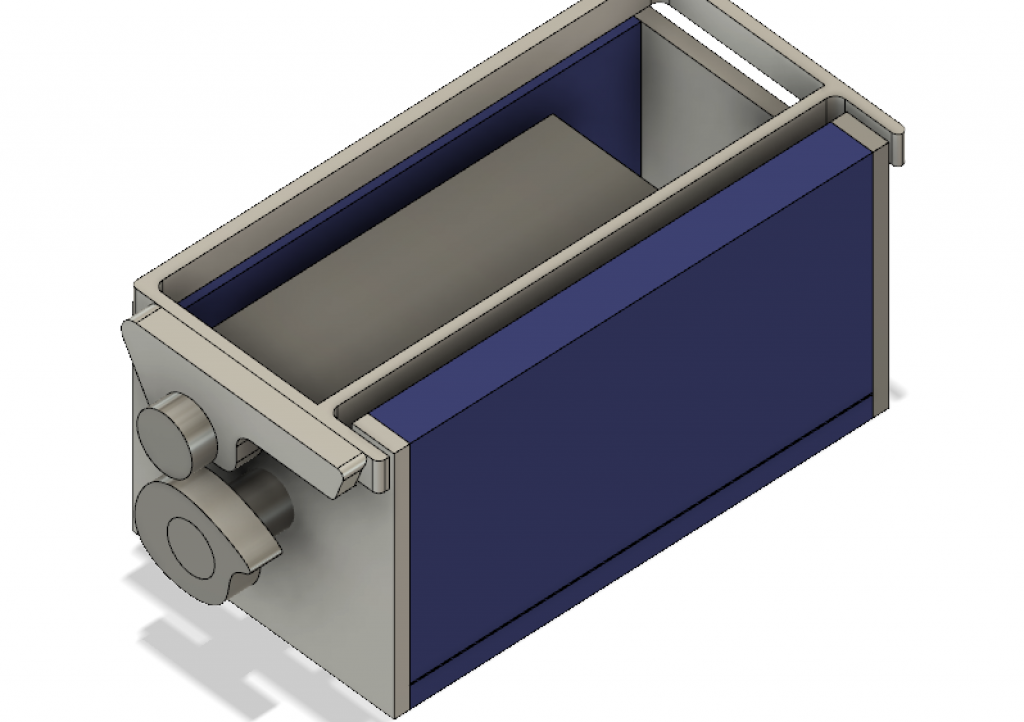
I started sketching some designs on my phone whilst bored in an airport somewhere. Using the basic premise as a commercial unit I thought “lets get some steppers, pop an eccentric cam on them, push a flap”. Rather than the bulky AC Servos I went to find a little Hybrid Servo/Stepper.
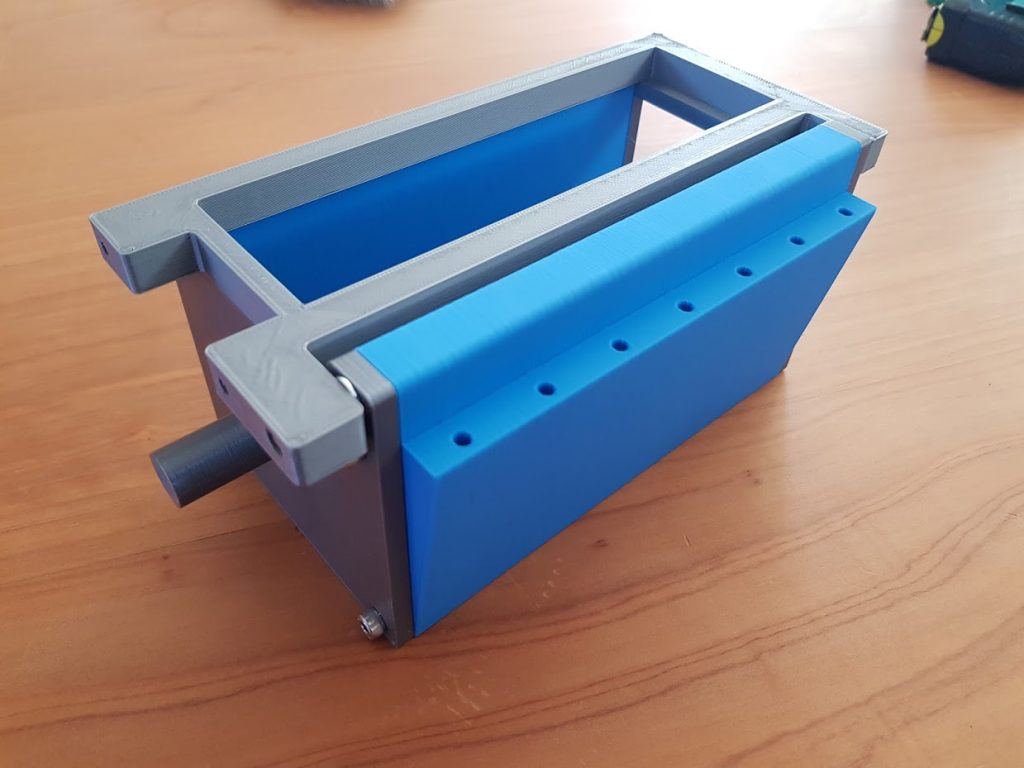
Using the printer I quickly put some low-fi mockups out to check sizing of components


I sketched up my initial designs and then gave myself a crash course in Fusion 360. I was staggered how quickly once you got the knack of things you could go from concept to things coming out on the printer [disclaimer I do work in construction industry 3d modelling software, so I should pick it up!]. Very quickly I started generating scrap 3d prints.
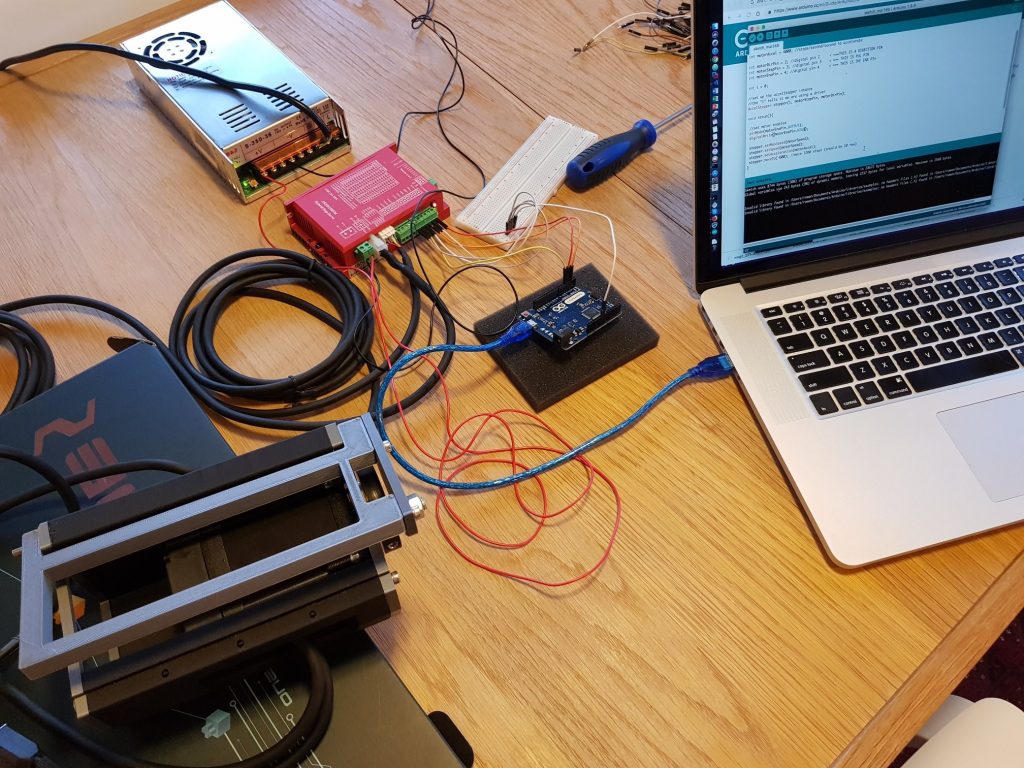
Mistake #1 Steppers are awful once you’ve gotten used to these lovely AC Servos. AC servos are silky smooth and quiet, steppers have noticeable steps, but moreover emit a lot of noise. Also the driver units are very primitive by comparison to the AASD drivers, I did do some hacking with the intention of trying to make it work, but eventually just gave up. After you’ve dug through the PN settings on the AASD manual and look at the dip switches on one of these drives, well, it’s like the wright brothers vs a SR71.
After much umming, and ahhhing I decided that it was time to go off to AC Servo land. Much debate was had with Saxxon66 about motors – whether to go for a self contained driver + AC Servo. In the end I went with my gut and decided to go for the 60ST-M01930 servo drive; it was a bit more compact than the 90 ST with a reduction in torque; how much torque do I need right? Off to the Sim Racers favourite friend; Master Jiang and David Liu in prompt order had some 60ST’s winging their way to New Zealand.